All about food

All about food

Thursday, March 31, 2016

Mary's Tea-Time Scones

Last week I stumble upon a Scone recipe from "The Great British Bake Off" by Mary Berry. I just couldn't take that recipe out of my mind, as scones are my favourite snacks.  I can have it for breakfast or any time of the day, but one thing for sure, they are the best tea-time snacks!  This is a very simple recipe, I start making it on the late evening and manage to have it for supper, and get to satisfy my scones craving....


Ingredients:
250 g self-raising flour (sifted)
1 tsp baking powder (sifted)
40 g butter (softened)
25 g caster sugar
1 egg
about 100 ml. milk

Methods:

  1. Put the flour and baking powder in a large bowl.  Add the butter and rub it in with your fingertips until the mixture resembles fine breadcrumbs.  Stir in the sugar.
  2. Beat the egg in a measuring jug.  Pour in the milk to make up to 100 ml., then set aside 1 tbsp for glazing the scones later.
  3. Gradually add the egg and milk mixture to the dry ingredients, stirring it in until you obtain a soft slightly sticky dough.
  4. Turn the mixture out onto a lightly floured surface and pat out until it is about 2 cm. thick. Use a 4 cm fluted cutter to stamp out the scones.  Make sure you don't twist the cutter or the scones will not rise evenly.
  5. Gently gather the trimmings together and pat out again to cut more scones until all the dough is used up.
  6. Arrange the scones on a greased baking tray and brush the tops with the remaining egg and milk mixture.
  7. Bake in a 220 degree Celsius preheated oven for 8 - 10 minutes or until well risen and golden brown.  Transfer to a wire rack to cool.
  8. To serve, cut each scone in half and top with butter and strawberry preserved.  You can even enjoy this delicious scones without any topping.
This scone recipe is so "Simple Yet Yummylicious!"

Tuesday, March 29, 2016

Chili Chicken

Opting for a savory and spicy dish??  Come, join me in my craving as I try a hand on this Chili Chicken dish which I came across in a recipe book "Relishing a taste of HOME" page 19.  I adapted this dish with some amendments, and as I decrease the portion of the chicken used, the other ingredients are also being amended accordingly.  Here's to share...


Ingredients:
2 chicken thighs with drumsticks
2 tbsp tamarind paste (add 1/2 bowl of water to squeeze out juice)
1/2 onion (sliced)
Cooking oil

Chili Ingredients:
5 shallots (peeled and coarsely cut)
1 stalk lemongrass (peeled to obtain white part only, thickly sliced)
3 small slices galangal
1/2 tbsp belachan
10 dried chilies (remove seeds and soaked)
3 cloves garlic (peeled)

Seasonings:
Dash of salt (to taste)
Msg (to taste)
Sugar (to taste)

Methods:

  1. Clean the chicken, trim off fat and cut into 4 pieces for each thigh and drumstick. Rub with some salt and set aside for later use.
  2. Blend the chili ingredients with a bit of water.
  3. In a deep wok, heat enough oil to deep-fry chicken pieces until golden brown. Dish and drain.
  4. In a clean heated wok, add 3 tbsp cooking oil and fry the chili ingredients, half way through frying add in sliced onions and continue to stir-fry until fragrant.
  5. Add seasonings and tamarind juice, stir to mix until it boils, taste for correct seasonings, depending on individual's taste buds.
  6. Add chicken and fry until it boils and the sauce has thicken.
  7. Off the heat, dish and serve with a bowl of freshly cooked warm rice.

Thursday, March 24, 2016

Pork Gyoza with Ginger Dipping Sauce

I have been wanting to try out this Pork Gyoza, a kind of Chinese dumpling which are of different types, depending on how they are cooked : boiled, steamed or pan-fried.  Since I am not in to making my own dough for the skin or wrappers, I bought the 'round-shaped' wonton skin from the Supermarket.  Surprisingly when I unwrap the packaging, I found that the skin or wrappers are rather small in size, what should I do then since I have already prepared my filling??? Well, I will try to make small tiny Gyoza instead, just that more time and patience are needed to do those tiny pleats.

This is the outcome of my worthy efforts.....


Ingredients:
8 ounce ground pork
1 egg
1 tbsp sesame oil
1 tbsp finely chopped ginger
2 tsp grated garlic
1 spring onion (thinly sliced)
1 1/2 tsp light sauce
1 1/2 tsp shaoxing wine
1 tsp cornflour
1/2 tsp sugar
1/2 tsp salt
Round dumpling wrappers
Cooking oil
Water

Ginger dipping sauce:
1/4 cup light sauce
2 tbsp vinegar
1 tsp sesame oil
1 tsp sugar
1/2" ginger (cut into thin strips)

Methods:

  1. For the ginger dipping sauce, combine all the ingredients into a small bowl and set aside.
  2. For the filling, in a bowl mix together ground pork, egg, sesame oil, chopped ginger, grated garlic, spring onion, light sauce, shaoxing wine, cornflour, sugar and salt and refrigerate for 20 minutes.
  3. To make the gyoza, place a bowl of cool water at your work surface.  Working with one wrapper at a time, keeping the rest to prevent them from drying.  Place a wrapper on your right palm, brush the edges with water using your finger or a small pastry brush, put a teaspoon of filling in the center of the wrapper, fold over and press slightly to spread out the filling.  Seal the edges by making pleats on the side facing you and pressing the sides together.  Set aside, cover with a damp towel and repeat with the remaining wrappers and filling until all is done.
  4. To cook the gyoza, heat 2 tbsp cooking oil in a non-stick skillet over medium heat until it simmers.  Quickly arrange half the gyoza bottom-side down in the skillet, and cook until beginning to brown on the bottom, about 1 minute.  Add 1/2 cup water to the skillet (it will splatter), cover with lid and let gyoza cooked until the skin are tender.  Remove the lid and cook until the liquid has cooked off and the gyoza are slightly crisp and brown on the bottom.  The cooking time depends on the size of the gyoza. If the skin is still not fully cooked, add a bit more water and continue to cook with lid on.  Repeat with another batch until all is done.  Serve hot with the ginger dipping sauce.

This recipe is adapted from Cooking Channel with amendments.

Wednesday, March 23, 2016

Snow Fungus Pear Sweet Soup

Snow fungus contains many good properties, which according to Chinese Medicine is good for health, and pear on the other hand pairs off well as it is popularly known to heal coughs, clears off body heat and others.  Thus on this hot and humid day, let us prepare this dessert for the family to enjoy.  This recipe is adapted from Kenneth Goh with amendments to suit my family's preference.


Ingredients: (serves 2)
1 bunch white fungus
2 medium-sized pears
6 red dates (seedless)
Rock sugar (amount depends on how sweet you prefer)
3 bowls water (medium bowl)

Methods:

  1. Soak the white fungus for about 15 minutes, cut off the hard part, tear into smaller pieces and set aside.
  2. Peel the pears, remove the center part, quartered and set aside.
  3. Place all the ingredients including water in a double-boiler and boil for about 1 hour.  Check and refill the water on the outer boiler until the soup is cooked.
  4. Serve in individual bowl either warm or cold, depending on individual preference.
Notes:  It is preferred to serve warm for those who are coughing and also to elderly people.

Monday, March 21, 2016

Dragonfruit and Avocado Popsicle

On a hot and humid day, Popsicle sure comes in handy, especially when it's home-made - healthy as they are made from FRUITS with very low sugar content!! This first recipe which I am going to share is adapted from The Fussy Palate.

(A)  Dragonfruit Greek Yogurt Popsicle (Makes 4)


Ingredients:
3/4 red dragonfruit (peeled and cut into chunks)
2 tbsp greek yogurt (for blending)
1/4 cup hot water
2 tbsp granulated sugar
1/2 tsp yogurt for swirling

Methods:-
  1. I will taste for the sweetness of the dragonfruit before I start making with the balance of the 1/4 dragonfruit to decide on how much granulated sugar to use.  If it is sweet enough then I won't add any sugar, but for this case it is not so sweet, so I decided to add 2 tbsp.
  2. To make the syrup, add 2 tbsp granulated sugar into 1/4 cup hot water, stir to mix until sugar dissolves and let it cool.
  3. Blend dragonfruit chunks, yogurt and sugar syrup until smooth.
  4. To assemble the popsicle, spoon 1/2 tsp yogurt into empty popsicle mould and top up with puree.  Do not fill to the brim of the mould as popsicle will pop-up slightly when frozen. 
  5. Use chopstick to stir slightly to create swirl pattern, top with lid and freeze overnight.
(B)  Avocado Popsicle (Makes 5)


Ingredients:
3/4 cup water
4 tbsp granulated sugar (original recipe is 6 tbsp, adjust according to your preference)
2 cups Avocado (peeled and chopped)
2 tbsp yogurt
1/8 tsp salt
Extra yogurt for swirling

Methods:
  1. Combine granulated sugar and water in a small pot over medium heat, cook until sugar dissolves, remove from heat and let it cool to room temperature.
  2. Place sugar mixture, avocado, yogurt and salt into a blender, process until smooth.
  3. To assemble the popsicle, spoon 1/2 tsp yogurt into empty popsicle mould, pour puree halfway, again add another 1/2 tsp yogurt over it and then fill up with puree. Again, bear in mind not to fill to the brim as the popsicle will pop-up slightly when frozen.
  4. Use chopstick to stir slightly to create swirl pattern, top with lid and freeze overnight.
I adapted this recipe from Health.com and by incorporating the two recipes together with some amendments, I have here two delicious thirst quencher to enjoy on a warm day.

On the first popsicle recipe I have some leftover puree, so I pop some ice cubes into the mixture, blend until ice dissolves and look what I have here... "Dragonfruit Smoothie," indeed nothing comes to waste! 


Thursday, March 17, 2016

Fried-Braised Fish

Another double-cooked dish to serve on my dinner table, and this time round it's a fish dish.  If I have white pomfret I will normally opt to cook this dish. The fish is sliced into big pieces; marinated with a few simple ingredients for few hours; medium fried in oil and braised with a sourish-sweet-saltish sauce.  Do give it a try if it suits your taste buds...


Ingredients:
1 medium white pomfret
1" knob ginger (peeled and smashed)
2 sprigs spring onion (cut into 1" length)

Marinade:
1 tbsp rice wine
2 tbsp light soy sauce
1 tsp five spice powder

Sauce Ingredients: (Mix together in a bowl)
1 tbsp rice wine
2 tbsp light soy sauce
2 tbsp tomato ketchup
1 1/2 tbsp sugar
1 tsp vinegar
1 cup water

Methods:

  1. Clean the fish, slice into big pieces (slanting) and place in a deep dish.
  2. Add in the ginger, spring onions and marinade ingredients.  Mix to combine and let marinate for few hours. 
  3. Just before cooking, remove the fish from the marinade, put aside and discard the marinade ingredients.
  4. Heat 5 tbsp cooking oil in a wok, deep-fry the fish in medium heat until golden brown, dish and drain.  Repeat until all is done.
  5. In the same wok, discard excess oil leaving 2 tbsp in the wok, add in the sauce ingredients, bring to a boil. Add in the fried fish and cook over low heat, turning the fish over from time to time, until gravy is nearly dry.  During braising taste for correct seasoning based on your own preference.
  6. Off the heat, arrange the fish pieces on a flat plate and serve hot.

Min Chiang Kuih

With some leftover pan-fried peanuts in hand, I've decided to try a hand on this recipe, a favourite snack of my hubby and daughter.  I like this small portion recipe, which is just nice for two, but I can easily increase the recipe portions to serve more whenever needed.  This recipe is adapted from "The Meatmen."


Ingredients:
130 g flour (sifted)
1/2 tsp baking soda (sifted)
1/2 tsp yeast
2 tbsp granulated sugar
1 egg
160 ml lukewarm water

Filling:
50 g pan-fried peanuts (without skin)
25 g granulated sugar

Methods:

  1. In a large bowl combine all ingredients and mix with a whisk until the batter is smooth.
  2. Cover loosely with a cling wrap and let proof for 30 minutes in room temperature.
  3. In the meantime, blend the peanuts and sugar.  The fineness of the peanuts depends on individual liking.
  4. To pan-fry, drizzle some cooking oil into a non-stick pan on low heat and spread evenly with paper towel.
  5. Add batter, cover and cook until the top nearly dries up, sprinkle peanut mixture generously over the top, cover and cook until cooked.
  6. Use a spatula to lift the kuih onto a flat plate, fold into half, cut and serve.

This is one easy-to-make and 'Simple Yet Yummylicious'  snack to munch away in the comfort of our home.  

Buttermilk Scones

This Buttermilk Scones have a soft light texture and I love the delicious buttermilk taste. I enjoyed having it warm and fresh from the oven with the melting butter and the not-so-sweet strawberry preserved ~ Yummy ~  This recipe is adapted from No-Frills Recipes with slight amendments to suit my needs.


Ingredients:
200 g self-raising flour (sifted 3 times)
1/4 tsp salt
2 tbsp sugar
50 g cold butter (cut into cubes)
150 ml buttermilk (mix low-fat milk with 2 tsp lemon juice and stand for 30 minutes)
Milk for glazing

Methods:

  1. In a bowl add flour, stir in salt, mix well.  Add cold butter cubes, rub with your fingers until resembles breadcrumbs.
  2. Stir in sugar.  Make a well in the center and pour in buttermilk, hold back a bit in case the mixture becomes too runny.
  3. Stir to mix with a pair of chopsticks, but do not over mix.  Dough should be sticky.  If dough is too dry, add in a bit of left over buttermilk from (2).
  4. Transfer dough onto a slightly floured work top.  Lightly pat dough to 1.5 cm thick and cut with a flour dusted 5.5 cm cutter.  Press cutter firmly into the dough.  Do not twist.
  5. Arrange scones on a lined baking tray.  Glaze scones with some milk.
  6. Bake in a preheated oven of 200 degree Celsius for 20 minutes.  Scones are cooked when they have risen and begin to separate in the middle and slightly brown on top.
  7. Transfer to the wire rack to cool.
Let's enjoy this simple yet yummylicious buttermilk scones with a cup of coffee....


Notes:  The leftover scones can be stored in an air tight container and put in the fridge, which can last for few days.  To consume, I will warm them up in an oven toaster and they are as good as the freshly baked ones.  


Tuesday, March 15, 2016

Stir-fried Hakka Yam Abacus Seeds

While I was watching an Asian Food Channel Program (AFC) hosted by Jason some time ago, he introduced this Tasty Hakka Suan Phan or popularly known as Abacus Seeds from Gerai Seong Kee, Stall 35, at Taman Selera, Jalan Othman, PJ Old Town.  Not long afterwards, I saw postings by Kenneth Goh in Food Bloggers and Foodies United as well as some of the members.  

To be frank, I have never tasted this dish before, and being a Hakka myself I've decided to digest this recipe, find out more information about it online and finally I made my first attempt and it turns out great!  From the starting of making the dough, which is the Yam Abacus Seeds, I have to put on my thinking cap (bearing in mind that I have never tasted this dish before), as well as my touch senses from my fingers as I gradually add the hot water into the dough, to come up with a just right texture. Guess, a good research always comes with a satisfying result ~ Hi-5 ~

Ingredients:
(A) Yam Abacus Seeds
350 g yam (peeled and cubed)
75 g tapioca flour
1 tsp oil
1/2 tsp salt
Enough hot water

Methods:
  1. Steam the yam until soft, lift out from the steamer and immediately drizzle oil and sprinkle salt into the yam and mashed until fine.
  2. Add in tapioca flour and slowly add in bit by bit of the hot water and mix with a spatula.
  3. When the dough is not too hot for our hand to handle, knead the dough, continue to add a bit of hot water until it become smooth, does not stick onto our hands and when we roll it, it will not crack or fall into pieces.  
  4. To make the abacus seeds I take a small portion of the dough and cover the rest which are still in the bowl with a damp cloth to prevent the remaining dough from drying out.
  5. Take a bit of the dough, roll into ball and press the center using our thumb and index fingers to form an indentation in the middle.
  6. Place the seeds in a container lined with parchment paper and put another piece of parchment paper on top for purpose of stacking the seeds to avoid them from sticking together.  Repeat with the rest of the dough until all is done. At this stage the abacus seeds can be stored in the freezer.  I will leave them in room temperature for a while before cooking, however, a source says it doesn't needs thawing.  
(B)  Frying Ingredients & Seasonings: (1 serving only)
  • Yam abacus seeds

  • 2 shallots (minced)
  • 2 garlic cloves (chopped)
  • 2 tbsp minced pork
  • 2 dried mushrooms (soaked and thinly sliced)
  • 1 1/2 tbsp dried shrimps (washed, soaked and drained)
  • 2 pieces black fungus (washed, soaked and sliced)
  • some chopped spring onions (not in picture)
  • pinch of salt
  • 1 tbsp light soy sauce
  • 1 tbsp oyster sauce
  • dash of white pepper
  • drizzle of shaoxing wine
  • 2 tbsp cooking oil
Methods:
  1. In a pot of boiling water, drizzle a bit of oil, add in the yam abacus seeds and let it boil.  Once the abacus seeds floats to the top they are cooked. Dish using a slotted spatula and put them into a bowl.
  2. In a medium heated wok add in cooking oil, saute minced shallots and chopped garlic, then add in mushrooms, dried shrimps and minced pork.  Stir fry until the ingredients are well mixed and fragrant.
  3. Put in the abacus seeds, give it a stir, then add in all the seasoning ingredients and stir until well mixed.
  4. As the dish is done, add in the chopped spring onions, give it another quick stir, off the heat, dish on a serving plate and serve hot!

I am very happy for the success of this dish, which is my first attempt.  I cooked a serving for my mum to taste and she gave me a "Thumbs-Up!"  I am proud of myself, being a Hakka who can come up with this Hakka Dish ~ cheers, cheers ~
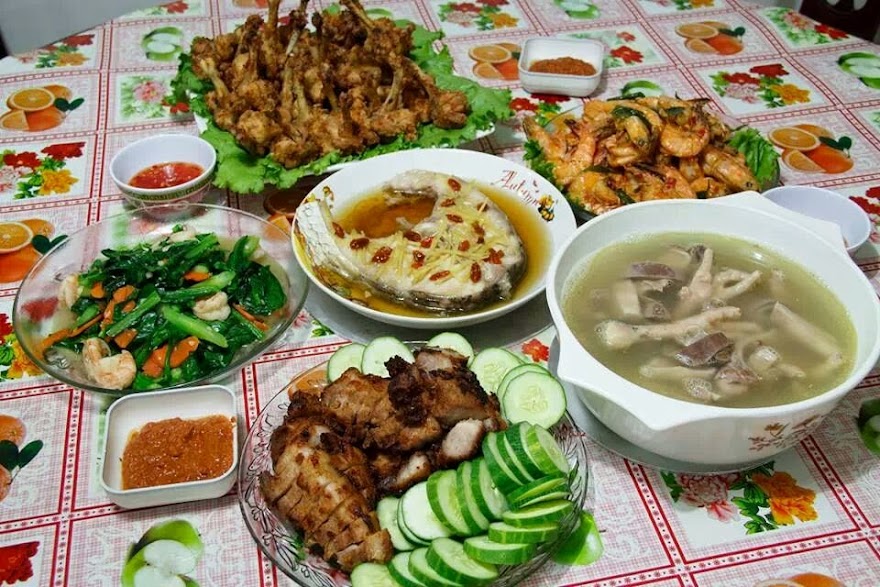
Saturday, March 12, 2016

Asam Fish

Another appetizing dish of the Kuek family which calls for more rice!  It has been a while since I last cooked this yummy dish - a balance of savory, sourish, slight salty and sweet which calls for much tasting during the process of cooking as I don't have any specific measurements for the seasoning ingredients.  It is more of 'practice makes perfect' as well as depending very much on individual's taste-buds preference.

Ingredients:
  • 2 black pomfret (scaled, cleaned and halved)


  • 2 sticks lemongrass (peeled the outer layer, leave whole and smashed)
  • 5 tbsp tamarind (mix well a bowl of water to obtain tamarind juice)


  • Some lady's fingers/Okra (optional) 


  • 3 tbsp cooking oil 
  • enough water (for cooking)
Blended ingredients: blend with some oil until fine
8 shallots (peeled and roughly chopped)
5 garlic cloves (peeled and roughly chopped)
4 red chilies (remove some seeds and roughly chopped)
4 chili padi (remove some seeds and roughly chopped)


Seasonings:
Salt (to taste)
Sugar (to taste)

Methods:
  1. In a medium heated wok add in 3 tbsp cooking oil, saute the blended ingredients for 1 minute, then put in the lemongrass and continue to stir until fragrant and oil separates.
  2. Add in the tamarind juice, seasonings and water, give it a stir to mix well.
  3. Add the fish (ensure the sauce ingredients is enough to cover the fish for it to cook properly), give it a toss and put the lid on.
  4. In between cooking, stir often, turn the fish over, ensure enough sauce or else add more water and taste for correct seasoning of your preference.  
  5. Just as the fish is almost cooked, add in the lady's fingers (if using) and put the lid on.
  6. Continue cooking until the lady's fingers are soft, turn off the heat and let the dish sits in the covered wok for a while before serving for the flavors to seep into the fish. 
  7. Serve with freshly cooked rice.

Tuesday, March 8, 2016

Healthy Wonton Vegetables Soup

I have been thinking, why is it that off late I have been going for something soupy for my lunch??  Can it be due to the drastic weather change since the start of the Lunar New Year, or simply a change of my taste buds??  Well, if it is for something better, which in this case 'healthy,' why not!

Today, I am cooking myself a 'one-bowl meal' of wonton with lots of vegetables: red carrot, bok choy and bittergourd.  A satisfying, simple yet yummylicious lunch to share with all...

Few simple ingredients: (1 serving)

  • red carrot (sliced)
  • bittergourd (sliced)
  • bok choy
  • some home-made wonton (refer to my recipe posting on 30 October 2014)

  • 1 red onion (peeled and sliced)
  • 2 garlic cloves (peeled and chopped)
  • 1 tbsp cooking oil
  • 1 bowl water
Seasoning:
Chicken stock granules (to taste)
Dash grounded white pepper

Dipping sauce: (mix together)
2 chili padi (sliced)
1 small lime (obtain the juice)
2 tbsp light soy sauce

Few simple steps:
  1. In a medium heated wok add cooking oil, saute the onion and garlic until fragrant, then add in the water.
  2. As the water is about to boil add in red carrot, bittergourd and chicken stock granules, continue to let it boil for about 1 minute.
  3. Put in the wonton, once the soup comes to a boil, taste for correct seasoning, add in bok choy and let it come to another boil.
  4. Off the heat, dish into a bowl and sprinkle dash of grounded white pepper.
  5. Serve hot with dipping sauce.
Lunch is served!

Fried Nian Gao

There are many ways of preparing and serving this popular Lunar New Year sweet cake. It differs from one household to another based on individuals preference.  If batter is used, it also differs, especially in the combination of ingredients.  My family too have our own styles of serving it, but today I would like to put a hand on the batter recipe from "No-Frills Recipes" by Sokehah Cheah.  The turnout of the fried Nian Gao - I love the crispy and crunchiness of the fried batter ~ YUMMY ~


Ingredients: 
Nian Gao (cut into your preferred sizes and thickness)
Enough cooking oil for frying

Batter ingredients:
2 oz. self-raising flour
1 oz. cornflour
1 tbsp rice flour
1/2 tsp baking powder
1/2 tsp salt
100 ml water
1 1/2 tsp cooking oil

Methods:
  1. In a bowl add in all the flour, salt and mix well.
  2. Gradually stir in the water and mix until you get a smooth batter.  If the batter can coat the back of the spoon, then it's of the right consistency.
  3. Add in the cooking oil, stir to mix and let the batter sit for 30 minutes.
  4. For frying, add enough cooking oil in heated wok.  When oil reaches medium heat, coat a piece of nian gao with the batter, place into the heated oil and continue with the rest, but don't overcrowd the wok. Flip the nian gao over to ensure that both sides are golden brown.  Dish and place them on a wire rack to let the excess oil drips off.
  5. Serve warm to enjoy the yummy crunch of this fried nian gao.
Since I have some nian gao leftover from my earlier fried, so I decided to buy some yam and sweet potato to make this "sandwich of yam-nian gao-sweet potato."  This is the best option for those who are not able to consume much of the nian gao due to its sweetness, as by combining the three together the taste is being balanced out.  I prefer this sandwich method of frying too, as it is not too sweet.


To prepare this, (1) peel and slice the yam and sweet potato to get almost the same size, but for the thickness, yam and sweet potato must be thinner as compared to the nian gao as nian gao cooks faster.  (2) to fry, dip a piece of nian gao, yam and sweet potato into the batter and sandwich the nian gao in between the yam and sweet potato, using a spoon place it into the medium heated oil and fry, turning over until both sides are golden in color and cooked.  Dish and place on a wire rack to drain off excess oil and serve warm. Since I have few pieces of yam and sweet potato left, I just dip them in the batter and fried, rather than throwing them away ~ ENJOY ~

Saturday, March 5, 2016

Double cooked chicken in chili-garlic-vinegar sauce

I name this dish 'double cooked' because it is cooked twice, firstly I use the Pak Lo style to cook the meat (it can either be chicken, pork or duck) and secondly stir-fry with soaked chop chili and garlic in vinegar, which in Hokkien is called 'sng nee cho.'  This is a popular dish of my late mum-in-law.  Normally she will use the pak lo duck breast slices to cook in this appetizing sauce.  For my case I will either use pak lo chicken or pork belly to cook this dish.

The first cooking
Ingredients:
2 chicken thigh and drumstick 
4 slices galangal
3 shallots (peeled and thickly sliced)
2 garlic cloves (peeled and smashed)
3 tbsp cooking oil
Enough water for cooking

Marinade: (estimate quantity as I don't use actual measurements)
2 tbsp dark soya sauce
1/2 tbsp salt
1/2 tbsp 5 spice powder
1 1/2 tbsp sugar

Methods:
  • Clean the chicken thighs and drumsticks.  Get rid of any excess oil, drain and place in a deep dish.
  • In a bowl mix all the marinade ingredients together.
  • Pour the marinade ingredients over the chicken, give it a rub to ensure that they are well coated.  Let it stand in room temperature for about 30 minutes.
  • Using a pestle and mortar, pound galangal, shallots and garlic until medium fine.
  • In a medium heated wok, add cooking oil, fry the pounded ingredients until fragrant and golden, off the heat, dish up the fried ingredients into a bowl, leaving the oil in the wok.

  • Using the same wok, reheat the oil using medium fire, add in the marinated chicken pieces together with the sauce, (the sauce won't be much), turning the chicken pieces to sear the surface.
  • Once the sauce starts to thicken add in water, it must be able to cover the chicken pieces. If the sauce is not dark enough add in a bit more dark soya sauce.  Give it a stir and put the lid on.
  • This process will takes quite a while, checking on the water constantly, turning the chicken pieces often to ensure that the meat is properly cooked through.
  • In between the cooking process, we can taste for correct seasoning.  Personally for me, our family's preference on Pak Lo will be slight salty and sweet.
  • Just as the meat is cooked, I add in the fried ingredients, stir to mix and let it simmer for about a minute or two. 
  • Off the heat, dish out the chicken pieces onto a plate and the sauce into a bowl, leave them aside for the second cooking.


The second cooking 
Ingredients: 
2 red chilies (chopped)
4 garlic cloves (chopped)
enough vinegar
1 1/2 tbsp cooking oil

Methods:
  1. To soak the ingredients, In a bowl add chopped chilies, garlic and  enough vinegar to cover them, give it a stir and leave aside until cooking.  
  2. When the chicken has cooled cut into small pieces (or you can debone the cooked chicken and slice into thin slices, which I've done before) and put them aside.
  3. Just before cooking, if the sauce from the Pak Lo has a layer of oil on the surface, use a spoon to scoop out the oil so that the final dish will not be that oily.
  4. Use a sift to separate the soaked chilies and garlic from the vinegar, just before cooking. 
  5. In a medium heated wok, add in cooking oil, fry the chopped chilies and garlic until fragrant.
  6. Add in the chicken pieces, stir-fry for about one minute, then add in half of the vinegar and the Pak Lo sauce, stir well to mix.  At this point I will taste for correct seasoning, add more vinegar if the dish needs more sourish taste and more Pak Lo sauce for a balance of sourish, slight saltish and sweet taste.
  7. Off the heat, dish on a serving plate and dinner is served!


If you are cooking this dish do remember to cook extra rice, as this appetizing sourish-savory dish opens up your palate!

For those who loves pork belly, you can also try a hand for this dish, here's to share....


Let's cook and enjoy a yummylicious meal everyone ~ cheers ~

Thursday, March 3, 2016

Quick and Easy Fruit Cake

I enjoyed making this quick and easy fruit cake recipe over and over again.  It is not that sweet with brown sugar, just the right size of a loaf tin as I prefer consuming it at room temperature than cold from the fridge and it doesn't request for soaking of the fruits in rum or brandy, as fruit cake is my grandson's favourite.

Ingredients:
100g unsalted butter
100g brown sugar
2 eggs, beaten
100ml. milk
225g self raising flour (sifted)
1/2 tsp ground nutmeg (sifted)
275g dried mixed fruits  (dried orange peel, green and red cherries and raisins)
6 whole red and green cherries (halved)


Methods:

  1. Beat butter and sugar using an electric stand mixer until light and creamy.
  2. Gradually stir in the milk, eggs, flour and dried fruits into the butter and sugar mixture.  Mix well.
  3. Pour the batter into a greased loaf tin.
  4. Arrange the red and green cherries on the top.
  5. Bake in a preheated oven of 170 degree Celsius for about 45 minutes or until a skewer inserted comes out clean.
  6. Let it stand in tin for 5 minutes.
  7. Turn onto a wire rack.
  8. Tea is served!

To obtain the original recipe click here

Muah Chee

I came across few recipes for Muah Chee and have been wanting to try a hand on it.  As this is a not-so popular food item in Kuching, we don't get to eat it often, so knowing how to prepare it is of benefit to us, as whenever we feel like eating we can just make it in the comfort of our sweet home to satisfy our yearning.

I adapted this recipe from MiMi Bakery House and is a very simple recipe to follow and enjoy.  I made some adjustments to suit my family's taste buds.  For the original recipe click here


Ingredients:
110 g glutinous rice flour
140 ml water
2 1/2 tbsp peanuts (pan-fried and peeled)
1 1/2 tbsp granulated sugar

Methods:
  1. Blend peanuts and granulated sugar until fine and put aside in a bowl.
  2. In a bowl mix glutinous rice flour with water to get a smooth batter.
  3. Pour batter into a non-stick pan lightly coated with oil.
  4. Cook using very low heat for about 3 minutes.
  5. Once batter has set it should roll together to form a lump. Toss for a while to ensure it is totally cooked.
  6. Remove into a plate to let it cool for a while.
  7. Use a scissor to cut the cooked dough into bite sized pieces and toss with the blended peanuts and sugar.
  8. Sprinkle the excess peanuts and sugar over the top.
  9. Enjoy!