All about food

All about food

Thursday, September 3, 2026

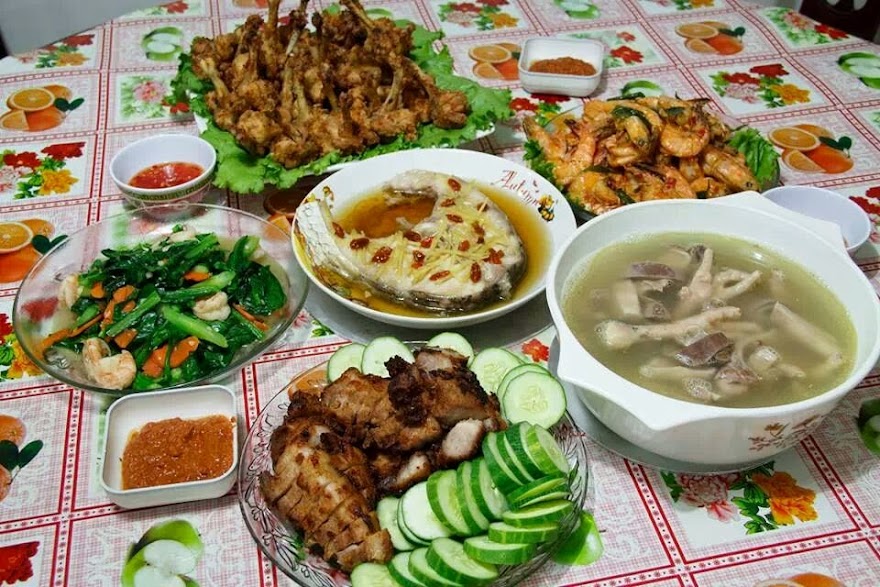
A platter of Chinese, Japanese and Korean

With the haze getting bad and the extreme torturous heat in the place where I am staying, I am opting for a little bit of Chinese, Korean and Japanese, just to draw me away for a bit from such uncomfortable situation.

Let me share this Simple Yet Yummylicious platter with all my friends, readers and supporters.

(1)  Taiwanese Crispy Chicken Breasts

Ingredients:

2 chicken breasts

1 1/2 tablespoon oyster sauce

1 tablespoon light soy sauce

1 tablespoon Shaoxing wine

1/4 teaspoon ground white pepper

1/3 cup tapioca flour/starch - for coating

3-4 tablespoons cooking oil - for pan-frying


Methods:

  1. Prepare the chicken:  Slice each chicken breast horizontally into half.  You should have 4 pieces.
  2. Marinate:  In a bowl, add the chicken, oyster sauce, light soy sauce, Shaoxing wine and white pepper.  Massage everything together until the chicken is evenly coated.  Cover and let it marinate overnight for best flavor.
  3. Coat the chicken:  When ready to cook, take the chicken out of the fridge and coat each piece evenly with tapioca flour/starch.  Shake off any excess.
  4. Pan-fry:  Heat the oil in a pan over medium heat.  Once hot, add the chicken and pan-fry both sides until golden brown, crispy and fully cooked through.
  5. Serve:  Plate on a serving dish with other side dishes and a fried egg, while the chicken are still hot.
This chicken recipe is adapted from 'Tiffy Cooks.'


(2)  Japanese Potato Salad With Cucumbers, Carrots and Onion

Ingredients:

2 potatoes (peeled and cubed)

1/3 Japanese cucumber (thinly sliced crosswise)

1/2 teaspoon rice vinegar

2 tablespoons Kewpie mayonnaise

1/3 carrot (peeled and thinly sliced)

1/4 white onion (peeled and thinly sliced)

1 hard boiled eggs (peeled and chopped)

1 spring onion (chopped)


Methods:
  1. Place potatoes in a pot and add enough cold water to cover.  Season generously with salt and bring to a boil over high heat.  Reduce to a simmer and cook until potatoes are easily pierced with a fork.
  2. Drain potatoes and transfer to a bowl.  Let slightly cool.
  3. Meanwhile, place cucumber slices in a bowl and sprinkle 1/4 teaspoon salt.  Mix well, then let stand for 10 minutes.  Drain any accumulated water, then gently squeeze cucumbers with paper towels to blot up any excess liquid.
  4. In a small bowl, whisk together rice vinegar and mayonnaise until well combined.
  5. Mash potatoes with a masher, allowing some small lumps to remain.  Add cucumber, carrot, onion, eggs, spring onion and mayonnaise mixture.  Mix well and season with salt to taste.
  6. Serve right away.  The salad can be refrigerated up to 1 day.  I made mine earlier and refrigerate it as I prefer it chill.
This recipe is adapted from 'serious eats' by Shao Z. with slight adjustments to suit my preference.


(3)  Korean Cucumber Kimchi

Ingredients:

1 Japanese cucumber

1/2 teaspoon salt

1 sprig spring onion

1/3 carrot

1 tablespoon gochugaru

1 tablespoon rice vinegar

1/2 tablespoon sugar (to taste)

1 garlic clove (peeled and minced)

1/2 tablespoon fish sauce

1 teaspoon sesame oil

1 teaspoon sesame seeds (toasted)


Methods:
  1. Wash and slice cucumber.  Trim ends and slice into 0.5 cm rounds.  Place in a large bowl.
  2. Sprinkle salt over cucumber slices, toss, and let sit for 15 to 20 minutes to draw out water.
  3. While cucumber rest, shred the carrot and slice scallions into 5 cm lengths, then into thin strips.
  4. Mix the kimchi seasonings in a bowl by combining gochugaru, rice vinegar, sugar, minced garlic, fish sauce and sesame oil.  Stir until sugar dissolves.  Adjust flavors if needed.
  5. Rinse cucumbers under cold water to remove excess salt, then drain well.  If very wet, gently squeeze out excess water.
  6. Add drained cucumbers to the seasoning bowl and toss to coat thoroughly.  Add shredded carrot and sliced spring onion and toss again until everything is coated.
  7. Sprinkle with toasted sesame seeds.
  8. Transfer to a serving bowl with cover and marinate in the fridge for at least 20 minutes.  Serve chilled or at room temperature.
This recipe is adapted from 'The Sidesmith' with slight adjustment to suit my preference.

Dinner is served!


Saturday, August 22, 2026

Milk Butter Toast

What's up for breakfast, the first meal of the day?  Came across this recipe from Kitchen Cookbook.  Thick-cut bread toasted to golden perfection and brushed with a sweet, creamy butter glaze!  Grab hold of butter, condensed milk, milk and salt; and 2 slices of my recent baked Sourdough Honey Oat Sandwich... Breakfast is served ~ YUMMY ~


Ingredients:

For the toast:

2 slices thick-cut bread


For the milk butter glaze:

25 g unsalted butter (softened)

1 tablespoon sweetened condensed milk

1/2 tablespoon whole milk

A small pinch of salt


Methods:

  1. In a small bowl, combine all the ingredients for the milk butter glaze.  The consistency should be thick enough to spread but soft enough to melt easily into the warm toast.  Set aside.
  2. Heat a non-stick pan over medium-low heat.
  3. Melt 1 teaspoon of butter for added flavor and golden color.
  4. Place the bread slices in the pan.
  5. Toast each side for 2-3 minutes, pressing gently, until the surface is crisp and golden brown, but the inside remains soft.  You are aiming for a texture like grilled cheese sandwich: crisp edges and soft centre.
  6. Once the toast is freshly toasted and still hot, place it on a serving plate.
  7. Immediately spread a generous layer of the milk butter glaze across the top using a butter knife.  The glaze will begin to melt and soak into the warm toast, creating a glossy, buttery finish with a caramel hint.
  8. You can add slice fruits as topping; sprinkle cinnamon sugar over the glaze before serving; add crushed nuts over the top; serve warm toast with a scoop of vanilla ice cream on top or add 1/2 teaspoon matcha powder to the glaze.  I did not use any of the above mentioned options, as my tummy is calling out loud "feed me now!" A cup of freshly brewed hot coffee is enough to go with it. 

Asian Cucumber Salad

 
Ingredients:

1 large Japanese cucumber

1/2 tsp salt


Honey Chili Garlic Vinaigrette:

2 tbsp rice vinegar

3 garlic cloves (peeled and finely chopped)

1 tbsp honey

1/2 tbsp toasted sesame oil

2 tsp PEKIN spicy secret sauce (or garlic chili sauce)


Methods:

  1. Washed and dice the cucumbers to 1/4-inch thick cylinder shape pieces.  In a large mixing bowl, toss with salt and let rest for 30 minutes.
  2. In the meantime, combine the honey chili garlic vinaigrette in a bowl.  It should taste garlicky, tangy, and a little sweet. Store it in the fridge.
  3. Rinse the cucumbers to remove the salt.  The cucumbers should taste a little salty but not too salty.
  4. Pat dry the cucumbers with a clean towel. Mix the cucumbers into the honey garlic vinaigrette.
  5. Arrange and stack them in a serving plate to make a tower.  Pour the excess dressing over the top and serve immediately.
This recipe is adapted from 'I HEART UMAMI' with slight adjustments to suit my cooking preference.

Thursday, August 20, 2026

Matcha Cream Scones

 
Ingredients:

260 g. plain flour (sifted)

10 g. Matcha powder (sifted)

85 g. caster sugar

1 tbsp. baking powder (sifted)

1/2 tsp. salt

50 g. raisins (washed in warm water, drain and pat dry with kitchen paper)

50 g. walnuts (finely chopped)

250 g. whipping cream (more for brushing)

1 tsp. vanilla extract

1 1/2 tbsp. brown sugar (for sprinkling over the top)


Methods:

  1. In a large mixing bowl, combine flour, sugar, baking powder, matcha powder, and salt.
  2. Add the raisins and walnuts, and stir to combine.
  3. Pour in the whipping cream and add vanilla into the dry mixture.  Use a sturdy spatula to stir into a shaggy dough.
  4. If the dough is too dry and won't come together, add more cream, one tablespoon at a time.  I did not add extra whipping cream.
  5. Sprinkle some flour on your work surface and transfer the dough onto the floured surface.  Flour your hands and a rolling pin.
  6. First, use your hands to pat (don't knead) the dough into a rough rectangle with the long side near you.
  7. Fold the two sides over to meet at the center.
  8. Then rotate the dough by 90 degrees, so the long side is near you again.
  9. Use a rolling pin to roll it out into a rectangle again.  Fold the two sides over to meet at the center again, rotate 90 degrees and roll it out into a rectangle again.  Do this one more time, so you do a total of 3 of this folding.
  10. After the last folding, you don't need to roll it out into a rectangle, pat the dough to shape into a roughly 7-inch round disk.
  11. I use a dough scraper to cut the disk into 8 wedges.  Slowly remove the wedges into a prepared lined baking sheet, about 1/2 inch apart from each other.  Brush the top with some whipping cream, and sprinkle with some brown sugar.  Chill the dough in the freezer for 30 minutes before baking.
  12. 15 minutes before the end of the freezing time. preheat the oven to 190 degree Celsius.
  13. Bake in preheated oven for 20-25 minutes.  Rotate the pan halfway through baking.  Bake until the top and the bottom of the scones are golden brown.  
  14. Remove the baking sheet from the oven and let the scones cool down for 5 minutes, then remove them onto a wire rack.
  15. Serve the scones warm.  They are best served on the same day if possible, but these scones are so good and they stay tender for 3 days in an airtight container at room temperature.  If you want slightly crisp scones on the outside, simply reheat them.
I adapted this recipe from 'What To Cook Today' with slight adjustments to suit my baking preference.

Chicken Udon Noodles

 
Ingredients:

2 packets Udon noodles

6 chicken tenders (cut into bite-sized pieces)

2 tablespoon cooking oil (part)

1 tablespoon minced garlic

1/2 onion (peeled and cubed)

1/2 carrot (peeled and sliced)

3 heads bok choy (sliced into thin strips)

1 tablespoon toasted white sesame seeds (optional, I did not put)

1/2 teaspoon ground black pepper

1 tablespoon water


Chicken marinade:

1 teaspoon light soy sauce

1/4 teaspoon ground black pepper

1 teaspoon corn flour/corn starch

1/2 tablespoon water


Sauce:

1/2 tablespoon light soy sauce

1/2 tablespoon dark soy sauce (depending on the darkness of your soy sauce)

1 tablespoon oyster sauce

1 tablespoon rice wine

1/2 teaspoon sugar


Methods:

  1. Blanch the Udon noodles as per packet instructions, drain and set aside.
  2. Marinade the chicken in light soy sauce, pepper, corn flour and water.  Let it sit for 10 minutes while you prep the veggies.
  3. In a heated wok, add 1 tablespoon of cooking oil, then add chicken.  Pan-fry over medium heat until cooked through and set aside.
  4. In a clean wok, add 1 tablespoon of cooking oil and saute mince garlic until lightly golden.
  5. Add onion, carrot, bok choy and 1 tablespoon of water, stir to mix well. Cook until carrot softens.
  6. Add back the chicken, udon noodles and sauce, then mix well and cook for 2-3 minutes.  Add 1-2 tablespoons of water if needed, and serve warm. 
This yummylicious recipe is adapted from 'cookingwithlei.com' with slight adjustments to suit my cooking preference.

Thursday, August 6, 2026

My Simple Fried Rice (Recipe 3)

Another Simple Fried Rice from my humble kitchen, comprises of luncheon meat, corn, carrot, onion and garlic.  My usual seasonings of oyster sauce, chicken stock granules and dashes of ground white pepper. As usual I am using Basmati Rice. Let's enjoy this 'Simple Yet Yummylicious' fried rice with carrot and chayote chicken soup...


Fried Rice is always the most simple and yummylicious dish to prepare and enjoy.  I believe, even for those who doesn't cook, they also know how to fry rice.  ~ SMILE ~

The Best Homemade Bread

Not only was I being tempted by the name of this homemade bread, but at the same time being attracted by the looks of it!  With just  few simple ingredients, and without egg and milk, let me share with everyone, a beautiful loaf of 'The Best Homemade Bread!'

"Simple Yet Yummylicious"

Click here for the full recipe.

Let me share some photos which I have captured during the process of baking this great bread...

From a small dough

To a huge dough

From this rolled dough

Rose to above the rim of the loaf pan


Let's have breakfast!