All about food

All about food

Tuesday, November 9, 2021

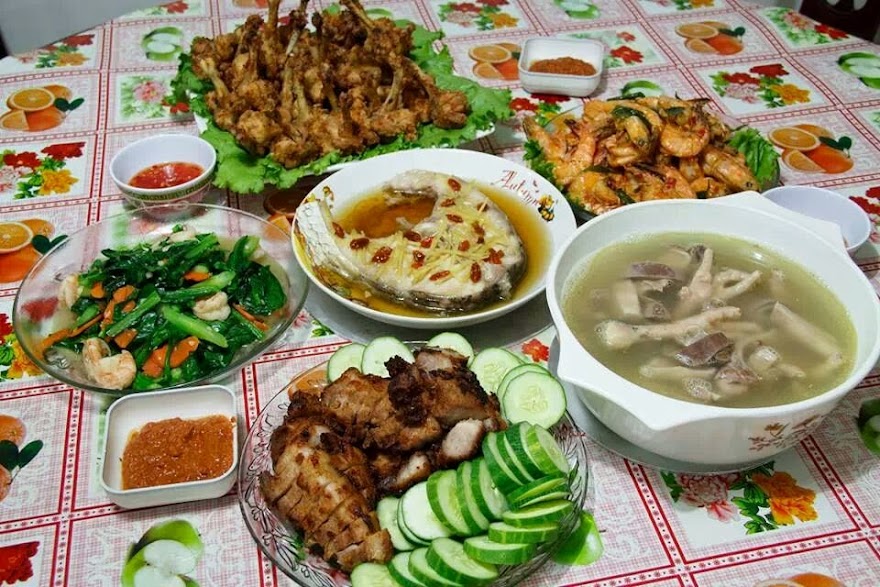
Salt and Pepper Crispy Pork Belly


Ingredients:


280 g. pork belly (skin on, sliced about 1")

1 onion (peeled and sliced slightly thicker)

1 red chili (sliced)

1 sprig spring onion (sliced)

2 cloves garlic (peeled and sliced)

2 tbsp. potato starch

1 1/2 tbsp. unsalted butter

1/2 tsp. chicken stock granules

Dash of ground pepper

1/2 tsp. chili flakes

Cooking oil (for deep frying)


Marinade:

1 1/2 tsp. ginger (peeled and chopped)

2 cloves garlic (peeled and chopped)

1 tbsp. Shaoxing wine

1 egg 

Dash of salt

Dash of pepper


Methods:

  1. In a bowl add pork belly and all the marinade ingredients.  Mix and aside to marinate for 20 minutes.
  2. In a flat dish, add 2 tablespoons potato starch. Coat marinated pork in potato starch and set it aside.
  3. In a heated pan, add enough cooking oil for deep frying.  Once the oil is hot enough, add in the coated pork belly one by one.  Do not over-crowd the pan.  If your pan is not large enough, deep fry it in two batches.  Once the sides of the pork belly are starting to brown, remove from oil onto a strainer.  Heat up the oil to high heat; put the pork belly back into the hot oil for second frying for more crispiness.  Once the pork belly has turn golden, remove from heat into the strainer and set aside.
  4. In a clean heated wok, add butter, once starting to melt add in sliced garlic and onion, give it a quick stir; then add in spring onion and sliced chili,  continue to stir-fry; then add in chicken stock granules and ground pepper, and stir to mix them well.  Next, add in chili flakes and continue to stir-fry.  Finally, add in the fried pork belly, stir to combine; and off the heat.
  5. Remove onto a dish.
  6. Ready to serve with a plate of warm fluffy rice.

I adapted this recipe from Youtube by: hoon & elen's today cuisine with a slight adjustment to suit my cooking preference.

Sunday, October 31, 2021

Taiwanese Windsor Bakery Bread


Ingredients:

250 g. bread flour, plus more as needed

1 tsp. instant yeast

25 g. granulated sugar

1/2 tsp. salt

1 egg yolk

140 g. milk, plus more as needed

25 g. softened unsalted butter


To brush on bread:

Egg wash

Icing sugar (dusting)


Methods:

  1. In a mixer bowl add all ingredients, except for butter.  Using a dough hook, knead at low speed until it comes into a rough dough, about 5 minutes.  If the dough is too dry, you can add a bit more milk, teaspoon by teaspoon.
  2. Add the softened butter and continue to knead on medium speed for another 15 minutes or until you reach a window-pane stage.  To check window-pane, just tear a small piece of dough, about 1" ball, flatten it with your fingers and hold it between your thumbs and slowly stretch it, you can stretch it thin like a membrane without it breaking.  If it breaks, try to knead for another minute or two and check again.  The dough should be smooth and very elastic at this point.  It is also important to note that you don't want to over-kneading the dough as the gluten can break and your bread will have problem rising.
  3. Oil the bowl and put the dough in there, cover and let it proof at a warm place for about 1 hour or when the dough has doubled in size.  To check, poke your finger into the dough and the indentation stays, the dough is done proofing.
  4. Punch the dough down to release air.  Tip it out onto a pastry mat.  Knead it a few times and then divide into 9 equal dough. Roll each into a round shape.  Cover and let them rest for 10 minutes.
  5. Grease a 9" x 12" baking pan with butter.
  6. Work with one dough at a time and keep the rest covered.  Take one dough and roll out into about 3 x 4 inches, then Swiss roll it up gently.  Pinch the seams together and put it aside and cover.  Repeat with the rest.
  7. Starting from the first one you roll earlier, roll it out longer with your fingers and palms, to about 7" in length.
  8. Place in the greased baking pan, and continue with the rest.
  9. Cover the pan and let the shaped dough proof again at a warm place for about 1 hour or until they are puffy.
  10. Preheat oven to 180 degree Celsius, 10 minutes before the end of the proofing time.
  11. Brush the dough with egg wash.
  12. Place the pan on the middle rack and bake for 15 minutes or until lightly golden brown.
  13. Remove from the oven and place on a wire rack to slightly cool down and transfer the bread from the baking pan onto a wire rack.  Dust icing sugar generously over the top.  I did not dust icing sugar at this point as it will melt and create sticky top.  I dust icing sugar only upon serving.
Before final proofing


After final proofing

Into the oven

Done baking!

My breakfast is served....


This recipe is adapted from 'whattocooktoday.com' with slight adjustments to suit my baking preference.

Saturday, October 30, 2021

Checkered Matcha Milk Loaf


Ingredients: 

Tangzhong:

20 g. high protein bread flour (sifted)

100 g. milk or water (I use milk)


Main Dough:

130 g. fresh milk (chilled)

1 egg yolk

30 g. caster sugar

1/2 tsp. salt

10 g. milk powder

280 g. high protein bread flour (sifted)

1 tsp. instant yeast

25 g. unsalted butter (room temperature)

Egg wash - for wash


Matcha mixture:

1 tbsp. milk

2 tsp. matcha powder (sifted)


Methods:

  1. Prepare tangzhong by mixing flour in water in a pot; whisk together ensuring the mixture is well combined with no lumps.  Cook over medium-low heat, stirring consistently to prevent burning and sticking while you cook.
  2. The mixture will gradually become thicker.  Once you notice that some 'lines' appear in the mixture for when you stir with the spoon, it's done.  Transfer into a clean bowl.  Cover with a cling wrap sticking onto the surface of tangzhong to prevent it from drying up.  Let cool for 15-20 minutes.  You can pre-make tangzhong ahead of time and store it chilled in the fridge for a few days.  If you have chilled your tangzhong, ensure to return it at room temperature first before using.
  3. For the matcha mixture; in a small bowl, add 1 tablespoon of milk and add sifted matcha powder into the milk.  Stir to combine and dissolve matcha powder completely.  Set aside.
  4. When tangzhong has cooled completely, in a mixer bowl, add egg yolk, milk, tangzhong, then followed by dry ingredients; sugar, salt, flour, milk powder and yeast.  Using a dough hook, mix on low until the dough almost comes together; add in butter, increase the speed to medium and mix until the dough is smooth, elastic and not sticky; for about 10 to 15 minutes.  Check to see if dough has achieved windowpane stage.
  5. Remove dough onto a pastry mat.  Divide dough into two equal portions.  Leave one to rise, and place the other back into the mixing bowl.  Add matcha mixture from (3) above, into mixing bowl and mix using the dough hook until well incorporated.
  6. Transfer matcha dough to pastry mat and shape both dough into smooth, round balls.  Let proof in a warm place covered with cling wrap until doubled in size; approximately 45 to 60 minutes.
  7. Grease hands lightly with neutral flavored oil.  Punch down both milk and matcha dough to deflate/degas.  Divide milk dough into 8 equal portions.  Roll each portion into a round, even ball then let sit on the table top to rest, covered using a kitchen towel/cling wrap for 15 minutes.
  8. Shape each portion into tight round balls and place in a greased loaf pan alternately.  This means if you are placing a milk dough on the bottom, you will need to place a matcha dough next to it on both sides, and also above it.  Cover with a cling wrap and let it rise for the second round of proofing.  This takes approximately about 45 minutes.
  9. During the last 10 minutes of proofing, preheat oven at 190 degree Celsius.
  10. Just before putting the proofed dough into the oven, brush with egg wash.
  11. Place the loaf pan at second lowest rack, at 190 degree Celsius for  25 minutes, then lower down the temperature to 180 degree Celsius and continue to bake for a further 10 minutes.
  12. Remove from oven and remove bread from pan and allow to cool completely on a cooling rack before slicing and serving.
Before 2nd proofing

After 2nd proofing

Out from the oven

My breakfast platter...


  • As usual, I make use of whatever size of loaf pan that I have in my pantry.  Thus, I portion each milk and matcha dough into 8 portions instead of the original recipe of 6 portions.
  • If you can't remove the bread right out from the oven, let it cool down a bit in the pan; then run a knife over the sides.
This recipe is adapted from 'thebakeanista.com' with slight adjustments to suit my baking preference.

Friday, October 29, 2021

Butter Chicken


Ingredients: (serves 2)

300 g. chicken thighs (skinless and boneless)

1/2 tbsp. chili powder (adjust the spiciness according to your preference)

1/2 tbsp. lemon juice

1 1/2 tbsp. unsalted butter

2 cloves garlic (peeled and finely minced)

1/4" ginger (finely minced)

1 tbsp. tomato paste

1 tbsp. tomato ketchup

1/4 tsp. garam masala

Salt (to taste)

1/2 tbsp. sugar

3 tbsp. water

2 tbsp. whipping cream

1/2 tbsp. parsley (roughly chopped)


Methods:

  1. Cut chicken into chunks, place into a bowl and marinate with half of the chili powder and lemon juice.  Set aside.
  2. In a heated pot, melt butter.  Add garlic, ginger and stir few times.  Add chicken and saute until turns white.  Add the remaining chili powder, tomato paste, ketchup, garam masala, salt, sugar and water.  Simmer on low until the chicken thighs are cooked through and becomes tender.
  3. Add whipping cream and chopped parsley; stir to mix well and remove from pot.
  4. Drizzle more whipping cream on top of the butter chicken before serving, if you like.
I adapted this yummylicious recipe from 'rasamalaysia.com' with adjustments to suit my cooking preference.

Japanese Corn Potage


Ingredients:

3 ear fresh corn

3 cups chicken stock

1 cup milk

1 small onion (peeled and diced)

30 g. unsalted butter

1 tsp. salt (add more to taste)

1 tsp. sugar

2 tsp. garlic powder

2 tsp. chicken stock granules

Garnish: Corn kernels, chopped fresh or dried coriander, cream


Methods:

  1. Cut corn vertically, to remove corn kernels.  Reserve the cobs.
  2. In a medium pot, add butter, saute onion till soft, about 1 minute.
  3. Add corn kernels, corn cobs and chicken stocks.  Bring to a boil and reduce heat, simmering for 15-20 minutes.  I scoop about 1 tablespoon of whole corn kernels and set aside as garnish.
  4. Turn off heat and remove corn cobs.  Let soup cool down a bit, then use handheld blender to blend soup until smooth.
  5. Turn on heat again, add milk and the rest of the seasonings.
  6. Bring to a boil and adjust seasonings.
  7. Serve Corn Potage on individual serving bowls, garnish.
Note: 
I keep excess Corn Potage in air tight containers in the freezer.  To consume, I take out from the freezer and leave in the fridge.  Warm up in small pot over stove top.  It is as good as freshly made ones.

I serve these yummylicious Corn Potage with my freshly home-baked bread...

Serve with Checkered Matcha Milk Loaf


Serve with Wholemeal Toast Bread

I adapted this Japanese Corn Potage recipe from 'Bear Naked Food' with slight adjustment to suit my cooking preference.

Thursday, October 28, 2021

Wholemeal Toast Bread


Ingredients:

300 g. wholemeal flour

200 g. bread flour (sifted)

2 tbsp. brown sugar

2 1/2 tsp. instant yeast

1 tsp. salt

1 tbsp. honey

320 ml. water

40 g. unsalted butter


Methods:

  1. In a mixer bowl, add wholemeal flour, bread flour, brown sugar and instant yeast.  Using a dough hook with your hand, stir the mixture.  Then add in salt, honey and water.  Mix at medium speed until the dough comes together.
  2. Add in butter and continue to mix for about 10 minutes, or until the dough pulls away from the side of the bowl.  Do a window pane test to check if the dough is ready.
  3. Tip the dough onto a pastry mat, lightly floured.  Fold and tuck the dough over to the bottom until it forms a ball.  Cover with a kitchen towel and let it proof for 1 hour or until double in size.
  4. Tip dough onto the pastry mat.  Flatten the dough with both your palms to degas.
  5. Divide the dough into 3 portions. Fold and tuck the dough over to the bottom until each form into a ball.  Cover and leave for 10 minutes.
  6. Take a dough and flatten with palm, then roll with rolling pin into oval shape.  Fold the longer left side into the middle, then the right side, where they both meet.  Using a rolling pin, roll from middle part up, and also middle part down, twice.  Fold and roll down the dough from the top using your fingers until the end nearest to you to form a log.  Pinch to seal the ends.  Repeat with the other 2 balls.  Cover and leave for 10 minutes.
  7. Take one dough, and place it vertically on the pastry mat, press using your fingers to flatten, then use a rolling pin to roll up from the middle, follow by down from the middle for 2 times until long; then turn over the dough, roll using your fingers from the top to the end nearest to you to form a log.  Pinch to seal the ends.  Repeat with the other 2 balls.
  8. Arrange on a greased baking tin.  Cover and leave to proof for 45 minutes.
  9. Spray the surface with a little water.
  10. Bake in a preheated oven of 190 degree Celsius for 40 minutes.  After 15 minutes, the top turns golden brown, cover it with aluminium foil, and continue to bake until the end of the baking time.
  11. Remove from the oven and place on a wire rack to cool.  Turn the bread out of the baking tin, once its slightly cool down.
  12. Slice and enjoy once the bread has totally cool down.
After first proofing

After second proofing

Note:
The actual size of the loaf pan is 23cm x 12cm x 11cm; since I don't have this size, I am just making use of whatever pan that is nearest to the size.  So, instead of dividing the dough into 2, I divide mine into 3; since my baking tin is longer but smaller in width.  

This recipe is adapted from 'Kathrine Kwa Baking Tutorial' with slight adjustment to suit my baking preference.

Tuesday, October 26, 2021

Five Spice Baked or Grilled Chicken Wings


Ingredients:

6 whole chicken wings

1 clove garlic, peeled and minced

1/2 tsp. five spice powder

1 tbsp. light soy sauce

1/2 tbsp. oyster sauce

1/2 tbsp. honey

1/2 tsp. sesame oil


Methods:

  1. Clean the chicken wings, then pat dry with paper towels.  Transfer chicken wings to a Zip lock bag. 
  2. In a small bowl, add garlic, five spice powder, light soy sauce, oyster sauce, honey and sesame oil. Mix to combine.
  3. Pour over the chicken wings, press the bag to remove air, lock and squish to combine the seasonings with the chicken wings.
  4. Leave in the fridge to let it marinate overnight.  In between, I continue to squish the bag and turn over, to ensure even marinating.
  5. Take the chicken wings out from the fridge and leave in room temperature one hour before baking/grilling.
  6. Arrange chicken wings on a rack place over a pan; bake in a Convention Oven of 180 degree Celsius for 20 minutes, or until golden brown; turn the wings over and let it bake until golden.  To get the charred, I turn over the wings (facing face up) and let it bake for another 3 minutes.
  7. Remove from oven and place the chicken on a serving dish.
  8. Serve with your favorite chili sauce.
This recipe is adapted from 'rasamalaysia.com' with slight adjustment to suit my cooking preference.